
Snow-Ready Before the First Flake: Mounting a Front Blade or Blower on Your Compact Tractor
10/28/2026
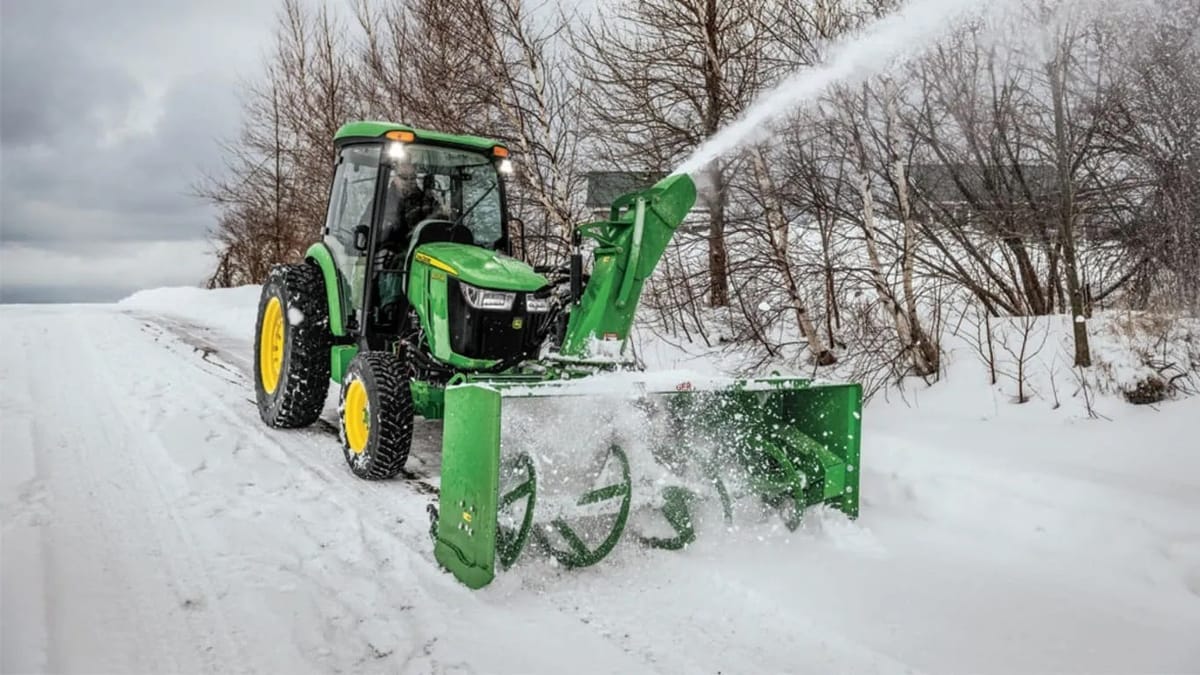
In Central New York and northern Pennsylvania, winter weather is something to endure, not just experience. With just one lake-effect band, your driveway can be buried overnight, and a simple snow shovel isn't enough to clear the way. To avoid getting snowed in, you need a more powerful removal system that's ready for whatever the winter mix throws at you. Pair your compact tractor with a front blade or snowblower to reach your driveway, barn, livestock, or even the road to work. In this blog, we'll help you determine the best setup for your property and show you how to mount your attachment so you're snow-ready.
Choosing your attachment isn't an either-or situation. Several factors, like snow depth, snow type, and where the snow can go, determine which option works best.
Many property owners looking for a simple snow removal solution choose the front blade. Best for moderate snowfalls under 6 inches, the blade works at an angle to push snow to the side, clearing hard surfaces like paved drives, gravel roads, and lots with ease. Unlike a snowblower, it also works year-round and efficiently moves snow, gravel, dirt, sand, or other loose material.
When snowfall is too high to push to the side, the snowblower can remove it completely. A blower throws snow clear of the drive instead of piling it, making it the more efficient choice for drifts and snow more than 8 inches deep. For people with long driveways, this is the preferred choice.
A front blade is one of the simplest snow removal attachments you can add to a compact tractor. Most of the setup only happens once, and after that you can hook up in a few minutes when the forecast turns. Here’s how to get your blade mounted and ready before the first storm.
Not every compact tractor is ready for a front blade right away. Many need a front-attachment support kit before you can install the front quick-hitch. John Deere lists this kit as a requirement for several 2 Series models, including the 2025R and 2032R. Compact tractors also need a dual selective control valve to operate the blade’s hydraulics. Check your operator’s manual, or ask your local SNPartners parts team exactly what your tractor needs.
Remove the mid-mount mower deck before mounting the blade. Running a front blade with the mower installed reduces your ground clearance and can damage the deck.
John Deere’s front quick-hitch slips over the tractor frame and locks in place with attached snap pins. You don’t need tools, and there are no loose parts to track down. The same hitch works with a front blade, rotary broom, and snowblower, so you can switch between attachments as conditions change.
Line up the blade’s mounting bracket with the quick-hitch and lock it in with the pins. Give the blade a firm tug to make sure it’s fully seated.
The blade raises, lowers, and angles using your tractor’s hydraulic system, which you’ll usually control with the loader joystick. Wipe the couplers clean before connecting them, since dirt in the lines can wear out seals and valves over time. Make sure each hose clicks fully into place.
Skid shoes control how close the blade’s cutting edge rides to the ground. On pavement, you can set the edge lower for a cleaner scrape. On gravel, raise the shoes slightly so you’re pushing snow instead of your driveway stone.
The last thing you want is to find out something’s wrong in the middle of a storm. Test it now by raising and lowering the blade a few times, then angle it all the way left and right. Check the hoses for leaks, kinks, or rubbing. If something doesn’t move the way it should, now is the time to call your service department.
A front snowblower takes a few more steps to mount than a blade because it runs off your tractor’s PTO and hydraulics. Most of the setup is the same, though, and once it’s done, you can switch attachments quickly all winter. Here’s how to get your snowblower mounted and ready to go.
Start by confirming your blower fits your tractor and that you have the right hardware. Like a front blade, many compact tractors need a front attaching support kit before you can mount the quick-hitch. You’ll also need a dual selective control valve to operate the blower’s hydraulic chute. Some heavier-duty blowers mount with a front 3-point hitch instead of a quick-hitch. Your operator’s manual or local SNPartners parts team can tell you which setup matches your tractor.
Take the mid-mount mower deck off first. Then slide the front quick-hitch onto the tractor frame and lock it in with the snap pins. If you already run a front blade, you’re using the same hitch. That makes it easy to switch between the two as conditions change.
Line up the blower’s bracket with the quick-hitch and pin it in place, then give it a firm tug to make sure it’s seated.
The drive shaft is what powers the blower’s auger and fan. John Deere’s blowers use a telescoping drive shaft with a lock-back collar that slides onto the tractor’s PTO. A support rod holds the shaft in position, so you can line it up without holding it by hand. Push the shaft on until the collar snaps into place, then pull back to confirm it’s locked. A loose shaft can slip off once the PTO is running.
Connect the hydraulic hoses to your tractor’s selective control valve. This lets you raise and lower the blower and turn the chute from the seat, usually with the loader joystick. Wipe the couplers clean first and make sure each hose clicks fully into place.
Skid shoes set how close the blower’s housing rides to the ground. On pavement, set them lower for a cleaner pass. On gravel, raise them slightly so the blower doesn’t pick up stones and throw them.
Before the first storm, start the tractor and engage the PTO at low idle while you listen for any grinding or unusual noise. Raise and lower the blower, then rotate the chute all the way in both directions. Check the drive shaft and hoses for anything loose, leaking or rubbing.
Let us take care of your equipment. Have your snowblower switched over in the shop by a certified technician and get free pickup and delivery on all turf equipment if you schedule service before December 30th.
Still not sure which attachment fits your property? Here’s a quick way to decide.
A front blade may be right for you if:
A snowblower may be right for you if:
If you’re still on the fence, stop by your local SNPartners store. Our team can look at your tractor and property and help you choose the right setup.
Your compact tractor is here to support you year-round. Whether you need a blade or blower for winter or a mower for spring, there's an attachment to get the job done. Reach out to your nearest SNPartners location today to find the right setup for your needs.
It depends on your snow and your property. A front blade works well for light to moderate snowfalls, generally under 6 inches, and short driveways with room to push snow. A snowblower is a better fit for deeper snow, drifts, and long driveways because it throws snow clear instead of piling it up.
Many compact tractors need a front-attachment support kit before you can install the front quick-hitch. You’ll also need a dual selective control valve to run the attachment’s hydraulics. Requirements vary by model, so check your operator’s manual or ask your local SNPartners parts team what your tractor needs.
Yes. John Deere’s front quick-hitch works with a front blade, snowblower, and rotary broom. It slips over the tractor frame and locks in place with snap pins, no tools required. Once it’s installed, you can switch between attachments as conditions change. Some heavier-duty blowers use a front 3-point hitch instead.